How To Clean Your Vape Tanks & Coils
9th Nov 2022
To maintain the performance of your vape kit and enjoy consistently great flavour from your e-liquids, you need to clean the vape tank and vape coil thoroughly and regularly. Thick vape juice or leftover residue can clog these key components, reducing the flavour of your favourite e-liquid.
Without regular maintenance, you'll have limited vapour production and reduced airflow too, thanks to gunked-up coils and the blocked airways of your tank. Below are some simple steps to save money and improve the quality and longevity of your tanks and coils. It is also important to clean your vape batteries.
Why is Cleaning Your Vape Important?
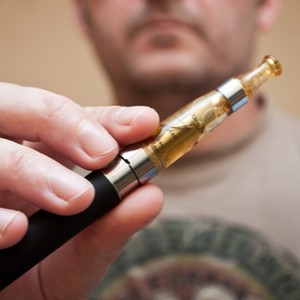
 A key aspect of maintaining your e-cigarette is cleaning the vape tank. Your tank, whether for MTL or Sub-Ohm vaping is the part of the device that holds your e-liquid, so you should be cleaning it every time you refill or at the very least once a week.
Residue will build up after each hit. Leaving excess gunk on the tank and then changing e-liquids without removing that leftover e-liquid will be problematic later on. After all, you don’t want your rich tobacco flavour to be interrupted by the sweet taste of strawberry!
How to Clean Your Vape Tank
- First, check that the tank is empty of any e-liquid remaining. Tip out any left.
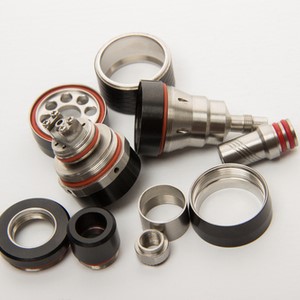
- Next, fill a large bowl with warm water and detach your vape tank, getting rid of any residual e-liquid while you do. Remember that every tank is different, so keep in mind how you took it apart to put it back together again efficiently.
- Take your tank and carefully wash it, just like you would your dishes! If your vape is particularly worse for wear, add a few drops of washing-up liquid to get any stubborn dirt off with a soft toothbrush.
- Then, dry with a paper towel and let the parts air dry for 24 hours to ensure it's thoroughly dry. Use a dry cotton bud for small gaps that may not dry so easily. Because of the timeframe, it’s handy to have a secondary coil and tank for continued use (if required) to ensure all of the moisture evaporates.

For a Deep Clean
Now and then, we recommend you give it a deep clean with some alcohol to get rid of any remaining residue. The process is pretty similar, but instead of submerging your components, give them a wipe with a paper towel or damp cloth and high-proof, non-flavoured alcohol (vodka or rubbing alcohol work very well!). Lemon juice or baking soda works a treat too! If you run into some particularly stubborn residue, keep scrubbing until it’s all gone, then wipe your components and rinse with warm water. Then, air dry as usual and put it all back together for a squeaky clean vape!
Why Clean Your Vape Coils and Understanding When They Need Changing
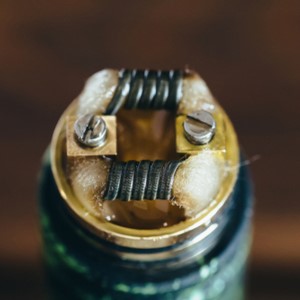
Now it’s worth mentioning that your vape coils will eventually burn out and need to be replaced, no matter how well you take care of them. If the wick of your coil has been burned or it has reached the end of its life, no amount of cleaning is going to bring it back, but if it has only been briefly or slightly overfired, or become clogged up with e-liquid residue, a good clean can give your vape coils a new lease of life!
If you’re not sure, try running your coil under a strong tap for a minute or so. If the discolouration looks to improve, it’s time for a cleaning. If your wick remains as dark and burned-out as before however, it’s probably time to call it quits. Should it appear that there is still some life in the coils and it just needs a little TLC, check out our steps below.
How to Clean Your Vape Coils
- When cleaning your vape coils, you should hold them under a hot running tap for a few minutes to remove as much residue as possible. As an added tip, blow into the open end of the coil so that water can pass into the wicking holes.
- Then, fill a bowl with your alcohol of choice to cover your coils. Cover with a towel to stop it from evaporating and leave overnight, or for as long as you can.
- Once they’ve had a good soak and you can see discolouration in the bowl, hold them under a hot tap for a few minutes again to get rid of any final residue, and then rinse them in a bowl of distilled water.
- Finally, blow through your coils or aim a hairdryer on low-medium heat to remove any excess water, and allow them to air dry until completely dry.
 It’s as simple as that! Just a few steps and a little bit of rubbing alcohol will help keep your vape coils in the best shape possible, so you get the most out of whichever vape device you choose. Following these steps for cleaning your vape tank and coils does not ensure eternal life for your key accessories but will help to prolong them to maximise flavour and longevity before purchasing some replacements. Happy cleaning!
